


Models
>
LSC27910SW
LSC27910SW (LSC27910SW /02) LG Refrigerator - Overview
Sections of the LSC27910SW
[Viewing 7 of 7]


Keep searches simple, eg. "belt" or "pump".

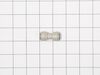
Handle Screw
PartSelect #: PS8752913
Manufacturer #: MJB63190001
This handle screw, also known as a mounting bolt, is a mounting screw to help secure the door handle to your refrigerator door. If your handle is loose, you may just need to tighten the screw. If your...
$9.35
In Stock

Guide Rail - Right Side
PartSelect #: PS3535267
Manufacturer #: MEA40002601
This is an authentic OEM part sourced directly from the manufacturer. The crisper slide rail for your refrigerator allows the crisper drawer to slide in and out, and supports the drawer as it does so....
$62.00
In Stock

Refrigerator Water Filter
PartSelect #: PS12714186
Manufacturer #: ADQ72910911
This is a single water filter that can be accessible inside the refrigerator. Water filters are designed to provide cleaner and betting tasting water, while also protecting refrigerators and ice machi...
$69.95
In Stock

Ice Tray
PartSelect #: PS3518775
Manufacturer #: 3390JA1150A
This part is the replacement ice tray for your refrigerator. The tray is made of white plastic and is approximately 9 inches in length, and 3 inches in width. It has the capacity for 8 ice cubes. The ...
$11.55
In Stock

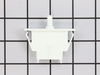
Guide Rail - White - Left Side
PartSelect #: PS3535268
Manufacturer #: MEA40002602
The right side to this part is no longer available.
$32.73
In Stock


Water Inlet Valve Assembly
PartSelect #: PS3527457
Manufacturer #: 5221JA2006D
This water inlet valve has three solenoid valves and push in fittings. When energized this part releases water from the supply line into the ice mold.
$138.59
In Stock

Lever Spring
PartSelect #: PS3524588
Manufacturer #: 4970JA3011C
This genuine OEM lever spring exerts tension between the ice maker door plunger and the ice maker itself on your refrigerator. If there is little to no tension holding your ice door seal in place, the...
$14.86
In Stock


Refrigerator Water Tube Fitting
PartSelect #: PS3524388
Manufacturer #: 4932JA3002A
The water tube fitting connects lines that supply water to components such as the ice maker and water dispenser.
$22.80
In Stock

Questions And Answers for LSC27910SW
We're sorry, but our Q&A experts are temporarily unavailable.
Please check back later if you still haven't found the answer you need.
Common Symptoms of the LSC27910SW
[Viewing 6 of 6]Leaking
Fixed by
these parts
these parts


Show All
Noisy
Fixed by
these parts
these parts


Show All
Door won’t open or close
Fixed by
these parts
these parts


Show All
Ice maker won’t dispense ice
Fixed by
these parts
these parts


Show All
Light not working
Fixed by
these parts
these parts
Show All
Not dispensing water
Fixed by
these parts
these parts
Show All
Keep searches simple. Use keywords, e.g. "leaking", "pump", "broken" or "fit".
Broken Guide Rail
This site was awesome! I was able to very quickly look up my refrigerator model, find the proper part number, and order the part. The only suggestion I would make is to update the cut sheet with a more clear version, it was a little difficult to make out the part number because the scan/drawing was fuzzy, but I was still able to make it
... Read more
out. Got the part in the mail very quickly and it was super easy to remove the old rail and install the new one. Take out the screws from the old one, remove the old rail, line up the holes, install the new one, and put back the screws. It's so nice to have a site like this to fine parts and order them! Too cool! Thank you so much!
Read less
Parts Used:
-
Nicole from BROOKSVILLE, FL
-
Difficulty Level:Very Easy
-
Total Repair Time:Less than 15 mins
-
Tools:Screw drivers
4 of 6 people
found this instruction helpful.
Was this instruction helpful to you?
Thank you for voting!
Refrigerator did not run. It made several rapid clicks, then silent, then a minute later more clicks.
I removed the lower back panel. The difficulty and time consuming part was finding the old parts. They were inside a cover on the side of the motor. The cover was difficult to remove. It slides away from the motor. The terminals on the replacement parts were oriented differently from the original, Like a mirror image. Accordingly,
... Read more
I reversed the wires (side to side) and connected them to the replacement parts. The refrigerator is now working fine.
Read less
Parts Used:


-
John from OCEAN SPRINGS, MS
-
Difficulty Level:A Bit Difficult
-
Total Repair Time:1- 2 hours
-
Tools:Pliers, Screw drivers
3 of 4 people
found this instruction helpful.
Was this instruction helpful to you?
Thank you for voting!
The ice tray had warped and dumped water, which then froze down through the ice bucket and below.
To replace the warped tray, I found the service manual (pg. 124 below) which took some interpreting.
Removed the lever. Then removed the assembly by two screws that are forward to the unit and go upwards.
The insulation, sensor, and sensor cover are simply pulled down and off and the unit separated to removed the tray, and ... Read more then insert the new tray. Proceed in reverse. Takes only a few minutes.
/Users/grf/Desktop/fridge ice tray.pdf
Read less
Parts Used:
-
George from ATLANTA, GA
-
Difficulty Level:Easy
-
Total Repair Time:Less than 15 mins
-
Tools:Screw drivers
2 of 2 people
found this instruction helpful.
Was this instruction helpful to you?
Thank you for voting!